Ruby on Rails 7: Windows Subsystem for Linux (WSL)
For me, using Windows as a development environment only made sense for dotnet languages, such as Visual Basic and C#. The idea of writing Ruby on Windows never felt natural.
However, with the advent of the Windows Subsystem for Linux (WSL), Microsoft promises to provide the best of both worlds. As I recently switched my machine from Fedora to Windows 10, I thought I’d experiment to see whether I could be pursuaded.
First, I downloaded Windows Terminal from the Microsoft Store. This neat application will allow us to manage WSL.
Windows Subsystem for Linux (WSL)
WSL leverages virtualisation technology to allow Linux distributions on Windows. With each Linux distribution running inside its own isolated container.
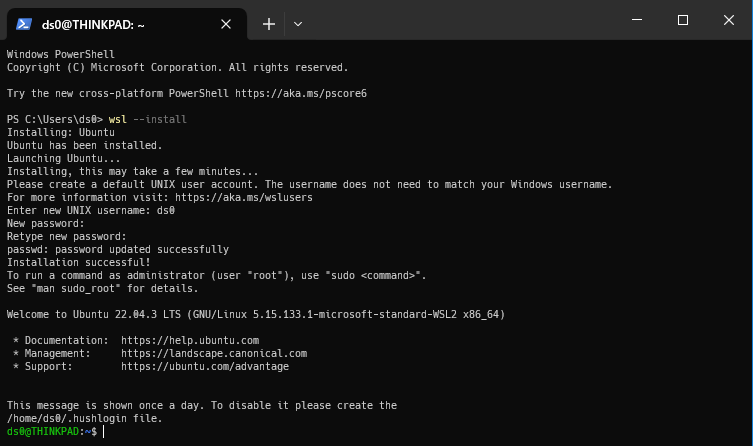
The installation for WSL is a quick oneliner:
wsl --install
This command will enable WSL v2 and download a Ubuntu instance. Once complete, set up your user account and give your machine a quick reboot. Further information can be found here.
That’s it, just one command was needed. To launch the Ubuntu instance, simply right-click the Windows Terminal application and select Ubuntu.
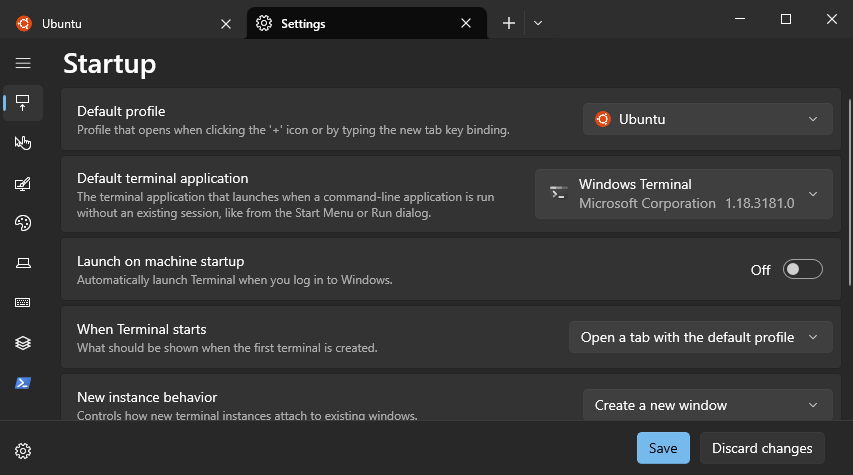
You can also set Ubuntu to be the default profile in the settings:
Now that we have WSL setup with ubuntu, lets configure the shell.
ZSH
Install ZSH and set it as the default shell:
sudo apt install zsh
Run zsh and select option 2.
Change the default terminal shell from BASH to ZSH:
sudo chsh -s $(which zsh)
Restart the terminal and confirm you’re using ZSH:
echo $SHELL
This should output /usr/bin/zsh or similar.
Making ZSH beautiful
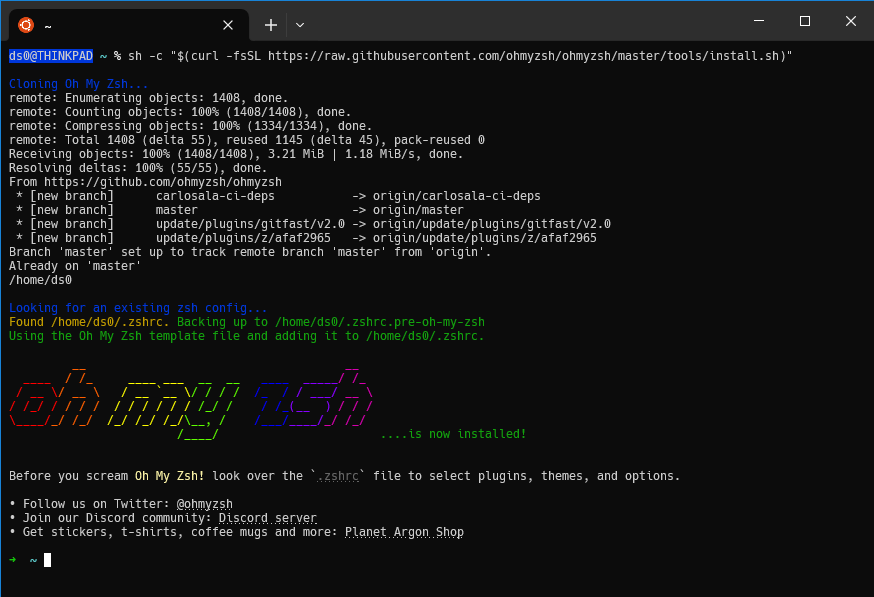
Install ohmyzsh:
sh -c "$(curl -fsSL https://raw.githubusercontent.com/ohmyzsh/ohmyzsh/master/tools/install.sh)"
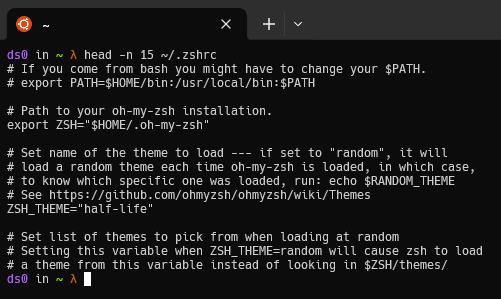
Select a theme and set it inside the ZSH_THEME attribute of your .zshrc file. I like half-life.
ASDF
Time to install a Ruby version manager. Most Ruby developers I’ve met use rbenv or Ruby Version Manager (RVM) but ASDF is an all in one version manager for pretty much every programming language out there.
Once ASDF has been downloaded, add the following to the bottom of your ~/.zshrc file:
. "$HOME/.asdf/asdf.sh"
Restart your terminal and confirm asdf is installed with:
asdf --version
Further information for installing and configuring ASDF can be found here.
ASDF works a little different to other ruby version managers. As it provides version management for a variety of languages, you have to select a relevant plugin to add. In our case we will add ruby:
asdf plugin add ruby
That was simple enough, now lets install ubuntu’s dependencies for Ruby: